Contents
Introduction
I’ve always liked clean separation when it comes to doing tasks on my PC. Not because of privacy, risk mitigation or anything like that: I just hate my PC feeling messy and bloated. For the longest time I’ve solved this by just using VMWare Workstation and having separate local virtual machines for work, research and other projects.
I recently went self employed (building Combat Theater, the worlds best malware technique emulator for blue teams?!) and I’ve become very mobile. Since my big desktop isn’t portable I of course went out and bought a Macbook Pro due to its exceptional battery life, power and pretty display… Slight problem:
x86 emulation still kinda sucks on ARM and all I really do is x86 stuff
So how do I keep my nicely organized x86 VMs accessible and usable across my desktop and laptop? I ran a Twitter poll to weigh the options. It was either Azure cloud VMs or building a mini home server.
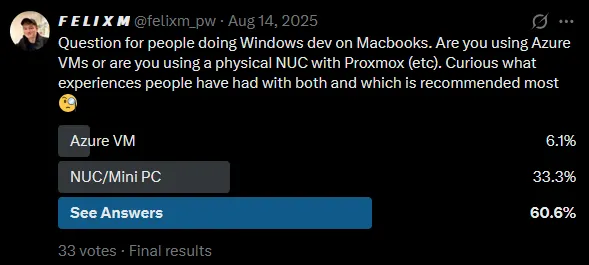
The consensus was clear! Thus I set out to build my mini server with the following requirements:
- Portable so I can take it with me if I want to spend time in another continent
- Low maintenance and setup time (no reconfigurations needed after I transport it)
- Quiet under use (if it’s in my hotel room I don’t want to hear it)
Now, it’s been about a year after building it and I can happily report that this was the best £850 I think I’ve ever spent. If you’ve ever even slightly considered a home server but live in a small apartment or wanted something portable, this blog post is for you!
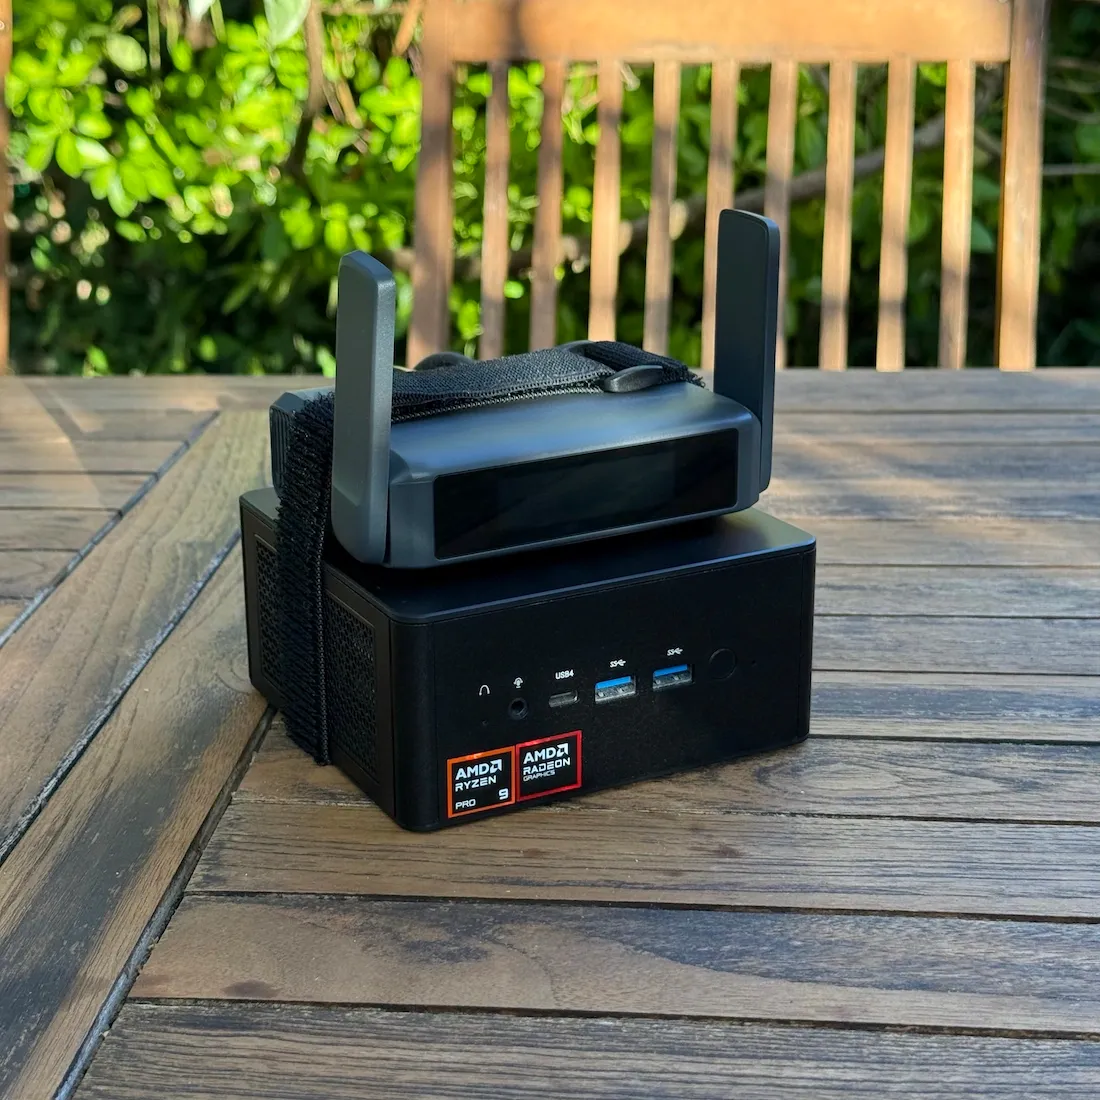
The Architecture
The traditional way of doing a home server is rather simple:
- Repurpose an old machine (or buy a cheap one) and install Proxmox
- Set it up close to your router so you can ethernet directly in
- Install Tailscale VPN to easily access it remotely
Now if you don’t need portability, that’s it. But if I bought a mini PC and did this, I can just throw it in a backpack and move my machine around right?
Unfortunately not. Since Proxmox is headless it would be a massive pain getting your mini pc setup with (for example) hotel WIFI. You would need to plug it into a hotel TV with an HDMI cable, bring a mini keyboard with you, etc.
What I wanted was one power cable into the wall, wait a minute or two, and everything just works. Sounds impossible but actually there’s just one small thing that enables it all and opens up a huge (and awesome) feature set for convenience and privacy:
BYOR (Bring Your Own Router)
That’s right, if we get a high end travel router, strap it to the mini server and then have a tiny ethernet and USB-C power delivery cable, we can essentially have our own network come with us anywhere we go. It works like this:
- Plug mini server into a wall outlet
- The mini PC powers the router via small usb c cable
- When the router boots you connect to it with your phone or laptop
- You tell the travel router which nearby access point you want to act as a repeater for via the web interface
- You connect to the hotel WIFI
- You now have your own completely private mini network for all your devices with internet connectivity
You don’t even need an internet connection to access your VMs, it’s all a local WAN!
Not only does this work very well but you also get a huge array of features:
- It can automatically pump traffic through a VPN for you
- It runs AdGuard so all devices connected automatically get DNS level ad blocking
- You can share the network with friends (me and @eversince shared a hotel at Botconf and he simply connected to my private WAN and I spun him machines in Proxmox to RDP into)
- You can use the router’s hosts file to do very easy local DNS (eg: kali.lan points my Kali Proxmox VM)
- You can Tailscale into the router rather than individual machines. This means once you connect to Tailscale you can access everything connected to the router even using the router’s local DNS
The Hardware Build
Warning
Clicking the links to the RAM and SSD will cause serious depression! I bought all of these items before prices skyrocketed, I paid £230 for the RAM and £190 for the SSD… Check the prices now at your own risk!
Below are the details for my build but in case this mini pc is no longer available or there are better options just make sure that the PC supports USB-C power delivery so it can power the router itself even if you turn off the machine power will still flow through to the router in case you want the PC off but still want the network features from your router.
The Mini PC
For the mini PC I wanted something small but powerful. Normally this comes at the cost of noisy fans that ramp up under the smallest amount of workload however after reading tons this seemed to not be noisy and still be powerful:
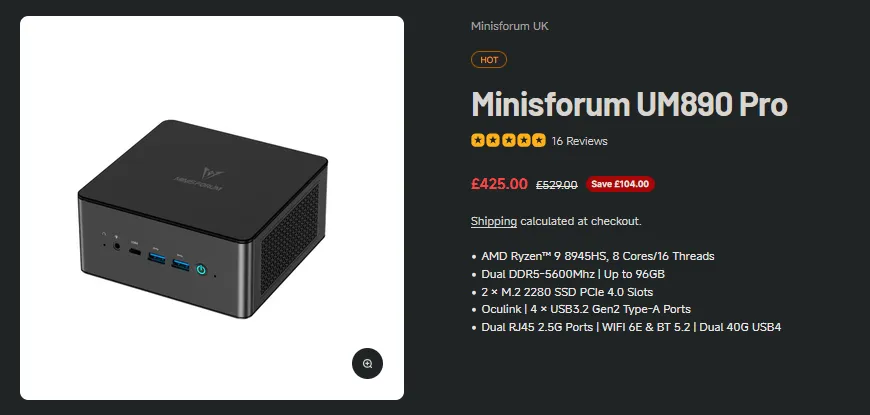
I went with the barebones kit so I needed to get my RAM and storage seperate:
RAM
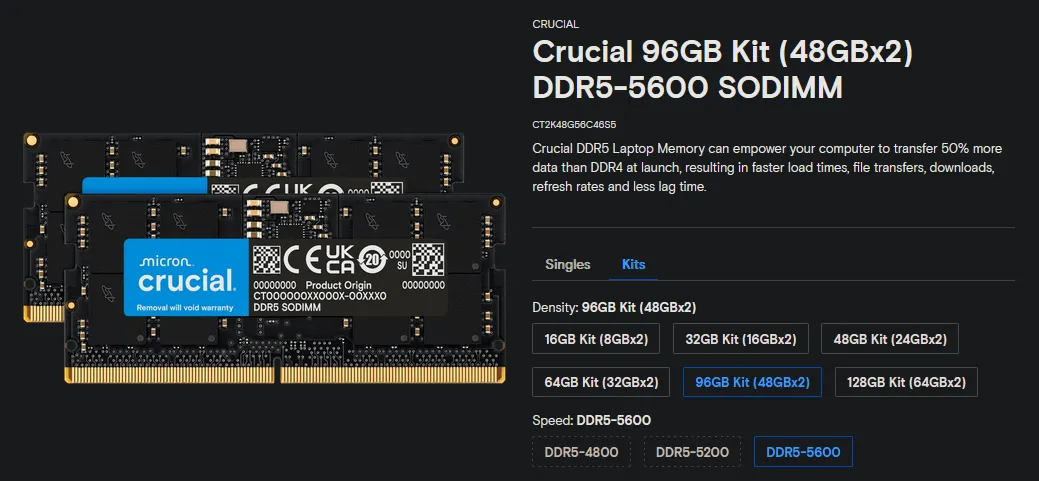
Crucial DDR5 RAM 96GB Kit (2x48GB) 5600MHz
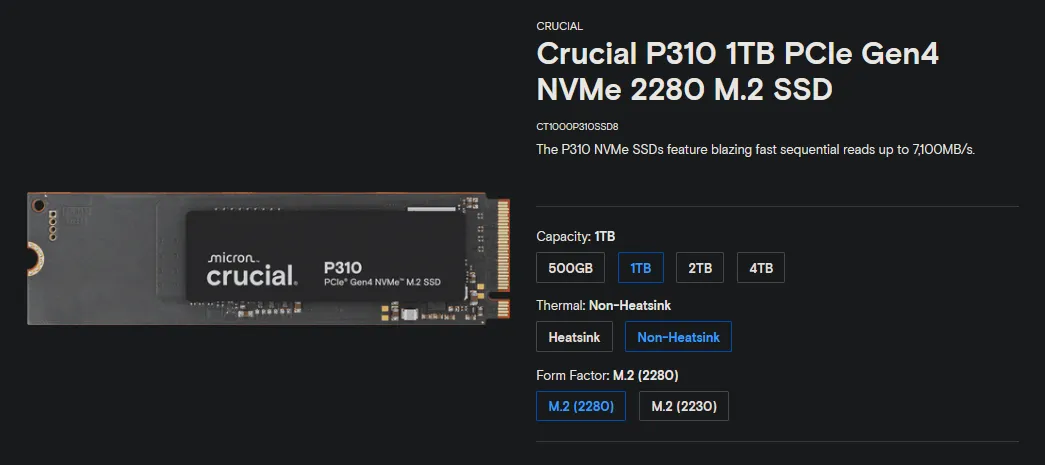
Storage
Crucial P310 4TB SSD M.2 2280 NVMe PCIe Gen4
The Router
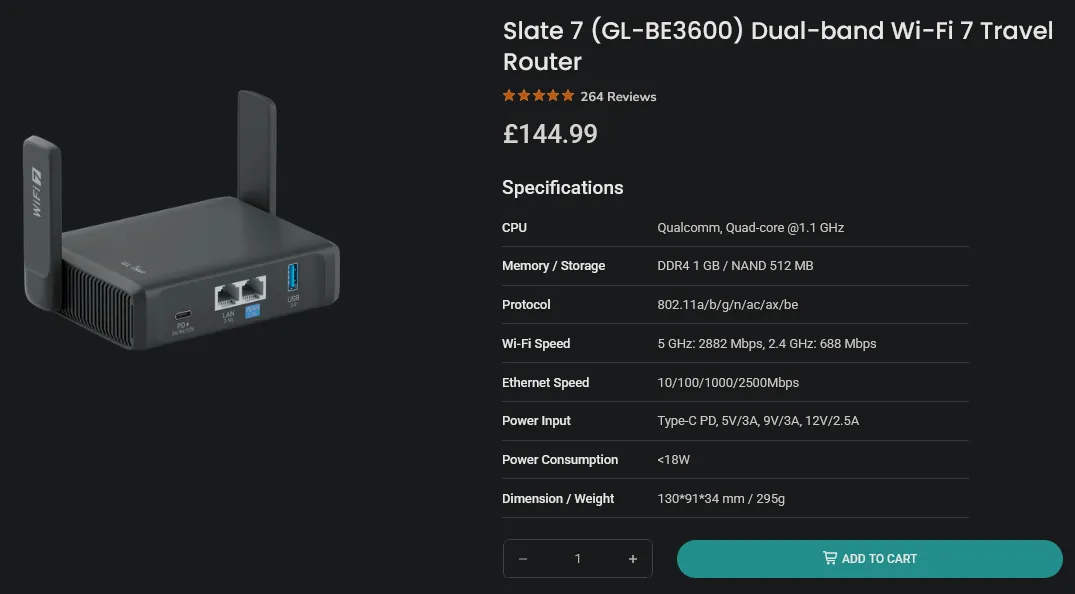
Not much research was required, the most powerful and feature rich travel router is this one by GLiNET:
Slate 7 (GL-BE3600) Portable Wi-Fi 7 Router
Other Bits
- 20cm CAT-6 Ethernet cable
- 20cm USB-C PD cable (make sure it’s a cable rated for Power Delivery)
- Carry bag (Get the small size)
- Velcro strap (I don’t remember exactly which size but super cheap so I guess just buy 3 different sizes ahah sorry!)
Setup
I did this a year ago so this might be a little rough and frankly you can just figure it out yourself but there are some small weird bits (like getting Tailscale to use local router DNS properly) so give this section a quick skim!
Setting up the server and router
This blog isn’t really a hand hold walk through but you’re smart and will figure it out. The TLDR is:
- Setup your router first, plug it into the wall, boot it, connect your phone or laptop to it and set it up to be a repeater to your home router
- Download Proxmox on another PC and put the iso on a bootable usb
- Plug your mini PC into a monitor and ethernet it into your new router then boot the USB, follow the instructions to install Proxmox
- Once you’ve followed the setup you can attempt to reach it from another device connected to your new router on
192.168.8.***:8006 - From there it’s functional and you can setup some VMs and stuff
Enable the cool router features
The Slate7 router I recommended above has some great features you can enable really easily:
- Enable AdGuard to block adverts and spam at the DNS level (like PiHole but better)
- Setup whatever your current VPN provider is in the router for auto VPN routing
- Setup Tailscale so you can access everything remotely with ease
How to do networking for VMs
It’s pretty straightforward: When you create a Proxmox VM and set the Bridge to vmbr0 it will act just like when you set NAT in VMWare so the VM will act as a completely separate machine. Since your mini PC is ethernet connected directly to the router no config is required. The VM will just appear in the router’s client section:
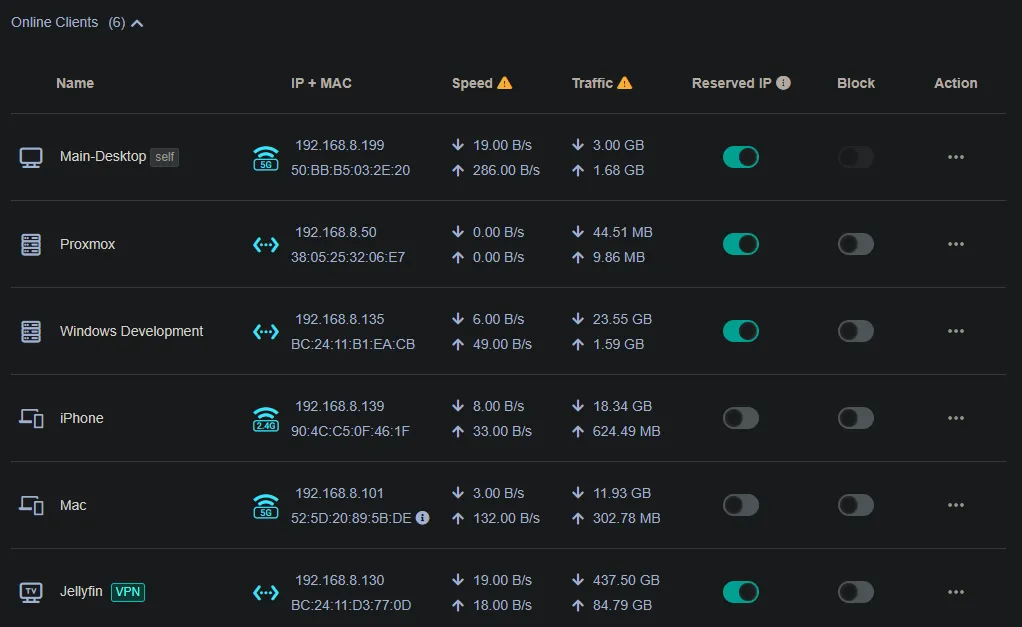
For anything you want to apply a hostname for just toggle the Reserve IP option for the client so DHCP always assigns the same IP. You can then go to Network -> DNS -> Edit Hosts and set hostnames:
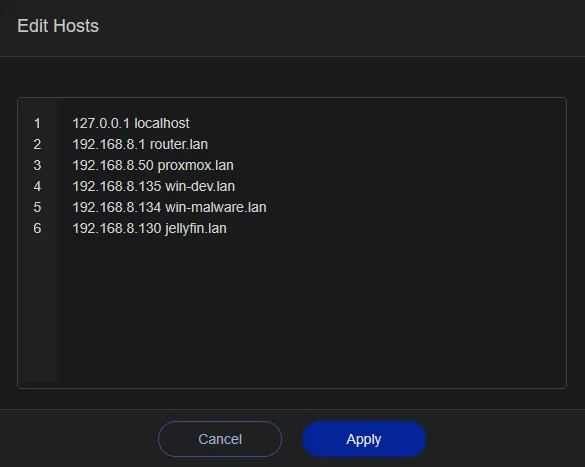
Super easy and don’t forget, since this is set on our router these hostnames will work no matter where you take your server or what network you connect it to!
How to get this DNS working in Tailscale
You generally have to fiddle around a little bit to get Tailscale working nice and clean but something I ran into was that Tailscale was not using the local hosts file on the router as a DNS source.
So when I was connected directly to the router I could ping http://proxmox.lan but if I disconnected and connected over Tailscale I could not ping http://proxmox.lan and I would have to use the raw IP address.
To fix this you can SSH into the router and edit the dnsmasq.conf to have option localservice '1'. This will allow Tailscale to use the local hosts file!
Extra things to do
GPU Passthrough
This isn’t a tutorial blog so if you wanna do it you can ask GPT to help you but the specific mini PC I chose has an AMD Radeon 780M dedicated GPU which you can pass through to a VM. Instead of passing it to a Windows machine I passed it to the Proxmox container that runs my Jellyfin media stack. This allows me to encode and transcode video formats like AV1 on devices that can’t natively play it!
Golden Images
Once you install your first Windows VM using the Tiny11 ISO, make it really nice. Install a proper browser and some basic general utilities. Set generic user creds (mine is User/User) then enable and setup RDP. Once that’s done shut down the machine → Right click and make it an “image”. Now you can instantly spin copies if you want quick throw away test machines or if you want to give your friends access to machines.
Auto start
Proxmox is super powerful, you can set VMs to auto start for you after the machine boots. I personally have mine auto launch my main developer VM and my Jellyfin media stack. If I want anything else I just log into Proxmox and manually boot.
Conclusion
Having a Proxmox home server is awesome, making it portable takes it to a whole new level. Even if you don’t need to physically move it, if you have flat mates or live in shared accommodation, having your own little private enclave brings a reassurance of privacy. If you can’t stomach the absurd component pricing right now I certainly wouldn’t blame you but if you happen to scout some used laptop ram and salvage an old NVME SSD I can’t recommend this form factor enough. Join me in the portable infra club!!
As per usual, any questions feel free to DM me on twitter!